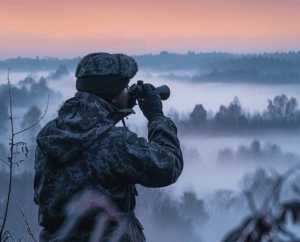
Once you have shot your deer, it’s time to prep it so that you can determine what quality of meat you can bring to the table and what kind of trophy you’ll be able to hang on your wall. Properly prepping your deer is a major part of deer hunting and all hunters should know how to prepare, field dress and skin your deer. Follow these deer hunting tips and your deer meat will be ready for the table.
The False Hoods of Bleeding A Deer
Never cut the deer’s throat after you have killed the deer. Once the deer is dead, the blood stops pumping through the heart and the veins. The blood will not move through the veins unless there is something to push it along. Also, if you cut the throat of the deer and you had planned on mounting it on the wall you will ruin the cape – which is the hide around the head, neck, and shoulders. This will hurt any taxidermy efforts.
If you insist on bleeding your deer, then try these deer hunting tips instead. First off, hand your deer upside down from a high point and then make a cut at the lowest point possibly. Gravity will work on the blood in the deer and will draw it out. If you intend to use the hide for mounting, try to make the cut small. Or don’t do it at all. There is a better way of doing it. Strip the deer and then soak the meat in an ice chest for few days until the blood has been drawn out. Not only will this preserve the cape, it will also age the meat a little bit before freezing it for later use.
Another fallacy is that hunters need to remove the tarsal glands of the deer to keep the meat from being ruined. Why? The deer lived with the tarsal glands without it tainting the meat and it’s not going to taint it when the animal is dead. Leave the tarsal gland alone and try not to touch the meat after handling the tarsal gland until you have thoroughly washed your hands. But there is no reason to remove them during the field stripping.
Deer Hunting Tips For Field Dressing Your Deer
When you get ready to field dress you deer, make sure you use a sharp knife and maybe a mountain cur with you. If reduce the amount of cuts you need to make to get the hide off the meat and it will make your life considerably easier. You will want to take you time doing this and not rush the process to avoid mistakes and any unnecessary trips to the hospital.
If you want your field dressing to go smoothly, follow these deer hunting tips to prepare you deer.
Take the animal and prop it on its back. The first cut should be made from just above the genital area all the way up to the rib cage. You have the choice to cut through a number of the ribs in the rib cage to the sternum or stopping at the bottom ribs. Do not make the cut too deep. Just go through the hide and stomach muscle or else you may wind up having to smell whatever is in the deer’s belly. Also, you don’t want to cut any higher than the sternum if you plan on saving the cape for mounting.
Next, turn the deer on its side to allow the guts to fall out. You will need to cut away the fat that holds the intestines in near the top of the cavity by the spine. Try not to bust the deer’s bladder. You can either ream the rest of the innards out working from the back to the front and cutting around the anus area and tying it off, or you can work the rest of the innards another way. With the guts hanging half in and half out of the deer’s body, cut away the diaphragm from the chest cavity, grab the esophagus from the inside, and then cut from the sternum up to above the esophagus on the inside of the deer. Pull the heart and lungs free and everything else will follow.
Wash up and then drag the deer out from where you field stripped it. Load it up into your truck, and then take it home to skin.
Skinning The Animal After Deer Hunting
Many hunters skin their deer in one of two ways. They can skin it by hanging the deer with the head up, or with the head down. Start by making a circular cut around deer’s neck, making sure that you connect it with the cut you made during the field stripping. The next move takes a little bit of strength. You remove the hide by grasping it with both hands and pulling down as hard as possibly. If you need to, carefully free the hide from the carcass with your knife, making sure you don’t cut or ruin the skin. Pull some more and then cut some more, working your way down. If you are saving the cape for later mounting, start removing the hide by cutting it in the middle and rear of the hide just behind the shoulder and working down from there.
Once you have the hide down around the shoulders, cut off the front legs just about the knees and then make a cut on the inside of the leg up to the first cut you made. Work the hide off the legs the way you did with the rest of the skin. Continue to work the hide off the deer. When you get to the deer’s tail, you can cut through the tailbone from under the skin and free it. When you get to the tarsal glands, cut through the back legs just above the tarsal gland and continue stripping the hide until it’s completely free.
Storing Your Deer Meat
Of course, field dressing and skinning takes a lot out of a person, especially if you’ve been up since the crack of dawn. You need to store your meat for butchering and while this article doesn’t go into the entire process of butchering your deer, you should at least break it down into pieces that are small enough to place into an ice chest that will keep the meat fresh and refrigerated for a few days until you can properly butcher it. Make sure you drain the water and add fresh ice to the ice chests as you work through butchering your deer.