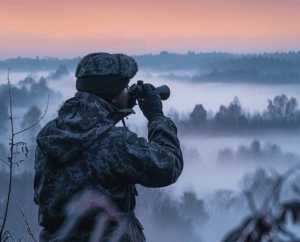
 Finding a good trail camera for your hunting needs can be challenging enough, but it is only half of the battle when you’re not sure of how to actually use one. This is a non-issue for veteran hunters, but it may not be the most obvious thing to newbie hunters. Thankfully, you have got blogs like these to set you on the right path to effective trail camera usage and getting the most out of your investment in this sort of technology! Through research and experience, I’ve been able to come up with a list of tips that new hunters should familiarize themselves with when using a good trail camera.
1. Do Your Homework!
No, I’m not your mother, but sometimes the nagging statement bears repeating. All too often, I’ve seen newbie hunters go into the hunt without having done their research on just where they’ll be putting up their brand-new trail cameras, and then later come back without any worthwhile pictures or with damaged cameras. And while it would be easy to call today’s youth stupid or irresponsible, common sense being not-so-common isn’t exactly a new thing.
In any case, do your research before putting up those trail cameras! In the online age we live in, not doing research is all the more foolish. Nearly every hunting and camping ground in the continental United States has aerial and satellite pictures to peruse the landscape. Many established sites even have a web presence, a website or a Facebook page, where one can look at pictures of these places. And nothing’s quite like going down there to survey the place yourself. Go ahead and do so!
Additionally, don’t be afraid to ask more seasoned hunters who frequent the site in question, or read up on testimonies about the site. Ask them where to put your trail cameras. They probably won’t tell you all of the good spots, but they’re often friendly enough to give a few pointers specific for that area.
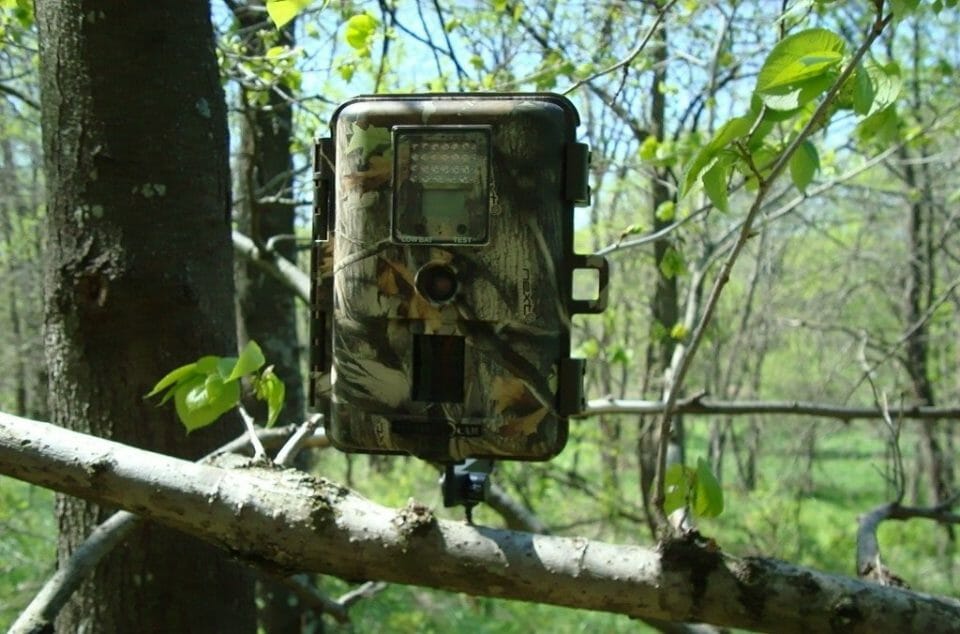
2. Hide Your Eyes!
A key component in hunting, in any sort of hunting, is to minimize your presence as much as possible. And while the benefits of keeping yourself hidden and hiding the trail camera may be obvious enough, it is also important that your trail cameras be likewise hidden. After all, you wouldn’t want your piece of expensive and high-tech gadgetry sticking out of the natural flora like the sore thumb it is.
Now, most trail camera manufacturers put camouflage plating on the front of the camera to make it blend in with the natural browns in the forest. This is useful, but remember to check and see if the bark of the trees in your hunting site match the “bark” of your camera. Additionally, make sure your camera emits no trace of human scent whenever you set it up or mess with it in any way. Coat it with scents that draw in deer. A deer’s senses should not be underestimated, and you don’t want your camera to be a deer repellent.
Another thing to keep in mind is the human factor, as in other humans might try to come in and steal or break your camera. Make sure your camera isn’t easily visible to an adult walking on ground level! Try to position your camera higher up in the trees, though still low and angled enough to where it’ll still track deer. I’ve heard more than a few horror stories of excellent hunters having their expensive cameras pulled off of where they were stationed, and it was all because the right steps weren’t taken to hide them.
3. Don’t Worry About It… Too Much
It doesn’t take an expert hunter to know that a whole lot of bad things can happen to a camera while they’re left out there in the woods, nor does it take an expert to know that checking back with a camera and finding perfect trophy buck pictures are a mind-addling excitement. But don’t let the risks or rewards get you to checking out your cameras every day.
The thing is, in an ideal world, we wouldn’t have to go up to our cameras in person and check up on them at all. The more you’re up there, the greater the risk of you leaving your scent on the device or in the area around it, which is sure to repel most any deer or animal. Try to minimize your trips to your cameras, and you may find the quality of your pictures improving.
How does one cut down those visiting trips, especially if one is a natural worrywart when it comes to things like this? Knowing your camera’s battery life will certainly help, for one. That way, you can schedule your visits around when the batteries inside need changing. Also take advantage of technological features like sending photos over e-mail or text, or cameras that will send you updates on the device’s status. Modern wireless trail cameras have all sorts of features to cut down visits.
4. The North Facing
One thing that always irritated me about trail cameras when I first started using them was just how it seemed like they would take a picture of any barely-moving thing. Every time I’d check on it, many of my photos would be of grass and trees swaying in front of the sun. These made for fairly pretty photos, but those weren’t the reason why I had put the trail camera up!
In any case, you don’t want your camera to be facing either the East or West if you can help it. Having your camera face the sun directly, whether it’s rising or falling, can really mess with the triggering mechanism on most trail cameras. The changes in light and movement are usually enough to trick trail cameras into firing off, even if there’s no buck to be seen.
A good rule of thumb is to have your cameras facing northward whenever possible. Because of the sun’s orientation, there will never be as much sunlight shining in from the north as there will be from the other directions. Having your cameras face south whenever north isn’t possible is also good, or at least better than having them face east or west. Southward-facing cameras still have the risk of sunlight shining into their lenses because of the tilt of the Earth’s axis, but the risk is slight and negligible in most cases.
Conclusion
While there are more many things to consider when putting up a trail camera, these are the absolute most important things one should consider when looking to make the most out of their trail camera investment. Things like seasonal placement and angling are important, don’t get me wrong. But, on the other hand, you don’t want people or animals finding and damaging your camera, or the sun setting off the camera at the wrong times, or your scent scaring away all of the animals. And you certainly don’t want to set up cameras where there’s nothing to take pictures of!
Just be mindful of where and how you set up your cameras, and you’ll have brag-worthy photos in no time!