The Ultimate Guideline: How to Use Vortex Venom Red Dot Sight
If you want to be one of the best at your shoot, your gun needs to have the relevant instruments. That is why red dot sights are famous among other options. Recently, manufacturers have increased their supply, and it can be hard to tell which one will work for you. On the other hand, those that are compatible with a range of weapons like the Vortex venom or viper, have been chosen over others that are specific to types of guns.
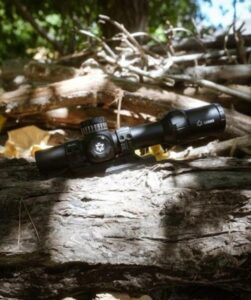
Vortex is known to produce quality optics, and Vortex Venom does not fail in the aiming task. You can select between 3 or 6 MOA; it all depends on what your eyes need. We are going to focus on how to use this sighting instrument on the AR-15 among other things you should know about it.
Why use the Vortex Venom Red Dot Sight?
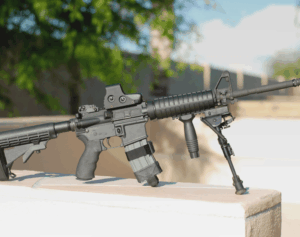
Unlike its rival, the Vortex Viper, it can be used on a range of firearms from pistols to larger rifles. When looking at it, especially on AR 15, it appears small and in other cases, angled depending on how you hold your gun as you engage. Despite the size, you are guaranteed of achieving higher shots on target when appropriately used.
You might want to cover it during transit or when working in thicker bushes but the lens is protected to scratch free level. Vortex achieves that by coating it with ArmorTek anti-reflective coating. That way, you get uninterrupted images. The reason why most people choose it is the wide FOV (Field of View) it gives. That’s how it’s useful regardless of the size.
Power controls are on the side and reachable after mounting. That way, you can adjust the brightness, switching between auto and manual and powering it off. Speaking of power, the battery is secured at the top which means it’s changeable without having to zero or remove it from the rifle.
If you want to aim further, it does a better job between 50 and 100 yards. Another reason you will want to buy the Vortex Venom is the accessories that come with it. They include extra screws, Picatinny mount (good for AR 15) and battery among others. Protection comes from the rubber cover which also helps in reserving battery power if you are not using it.
How to Mount Vortex Venom on AR 15
Since AR 15 rifles have the Picatinny rail, you are good to go, with the Vortex venom. Here are the steps to correctly place it before starting to aim.
- Using thread locker on the screws
You will be using the AR to shoot so there will be vibrations along the body. As you continue to shoot, the screws may loosen, and that makes the sighting optics to shift. To avoid that, consider applying some thread locker on the screws during mounting. After that, you will not have to worry about optic’s movement while perfecting on making target shots.
- Installing the Venom
First, place the low rail mount on the sighting scope and use the screws to tighten. Since you are using AR 15, you can choose to add a raiser for better eye level. It’s included in the package to raise the optics to a higher height on the AR.
After that, attach the optic on the Picatinny rail, allowing the recoil lug to sit in groove firmly.
When mounting this instrument, you also need to make sure the clamp is entirely down and attached around the outer base part.
- Moving the red dot to the first half of the rail
Since the sighting optic has a longer eye relief, you don’t need to mount it closer to your eyes. It can be attached further and still be apparent to the eye. Furthermore, if you want to use other instruments such as a magnifier, you can do mount them behind the red dot.
- Forward mounting as you tighten
When using your rifle, whatever you mount on your rifle will tend to move forward as you shoot. The gun moves back due to recoil, but the optics will want to stay stationed hence the forward movement. Another thing, the slots on the Picatinny can be wider than the mounting screws.
The solution here is to push the Vortex instrument forward as you tighten the screws you applied the thread locker. Doing so will prevent movement during recoil.
As you push forward, also remember to apply a downward force so that the clamp can stay tight after screwing. You can use a flat blade screw to drive the screws or a large, flat coin.
How to sight in a red dot on AR 15
Once you have successfully mounted the optics, it’s time to sight and aim. If you want to sight it in correctly, it would be better when you start with 25 yards then follow to 50 yards as you progress.
The final sighting distance should be put into practice after trying the shorter distances. For sighting steps, follow the following procedure.
- As you start, use a three-shot group center as your reference.
- If you need to increase or decrease the brightness, use the upper arrow and lower arrow respectively.
- Use the upper calibrated dial to adjust the elevation and the dial on the side for the windage adjustments.
- At 25 yards, every click results to a ¼-inch adjustment. When you sight in at 50 yards, every click brings in about ½ an inch of adjustment.
- If your AR has an iron sight, that’s much better. Adjust the windage and elevation until the dot is seated on top of the iron sight.
- Once everything is ready, fire after taking a deep breath. If you are not yet on target, adjust accordingly and shoot again.
Conclusion
Since it is not easy to try out many sighting optics especially if you have different weapons, using one on the models you have becomes easy. That is why we recommend the Vortex Venom since it also goes on AR 15 rifles. You may note some issues when using it, but since it’s affordable and has more features to benefit from, you have the best aiming companion as you perfect on target shooting.


